

Shower Leak Investigation: Finding the Hidden Source

REAL-WORLD LEAK DETECTION STORY | PORTUGAL
Two previous assessments blamed the silicone. A €300 investigation revealed a hidden water pathway beneath the shower base and changed the outcome.
Imagine paying €950 to repair a leaking shower and repaint your neighbour’s damaged bathroom ceiling, only to find the water coming through again after the next shower.
That was the expensive possibility facing Bernardo, an apartment owner in Portugal.
The problem had already been assessed twice, and both professionals had reached the same conclusion. Yet neither had identified where the water was actually escaping.
A recommendation from a mutual friend led Bernardo to All Property Building Diagnostics. What followed was a careful investigation, a ten-minute fluorescent tracing test and a result that completely changed the proposed repair.
Two Inspections. The Same Diagnosis.
Water from Bernardo’s upstairs bathroom had been reaching the apartment below. The downstairs neighbour had staining and deteriorating paint on the bathroom ceiling, with water dripping through in places.
The insurance company sent an assessor, who attributed the leak to failed silicone around the shower. Because damaged silicone was treated as routine maintenance, Bernardo was told the repair would be his responsibility.
He then paid a separate leak-detection specialist to take a look. The second opinion? The same: the silicone was supposedly the problem.
The specialist quoted approximately €950 for the proposed shower repair and the downstairs ceiling. Bernardo could have accepted the quotation and hoped for the best. Instead, he sought another opinion.
A Small Detail That Changed the Investigation
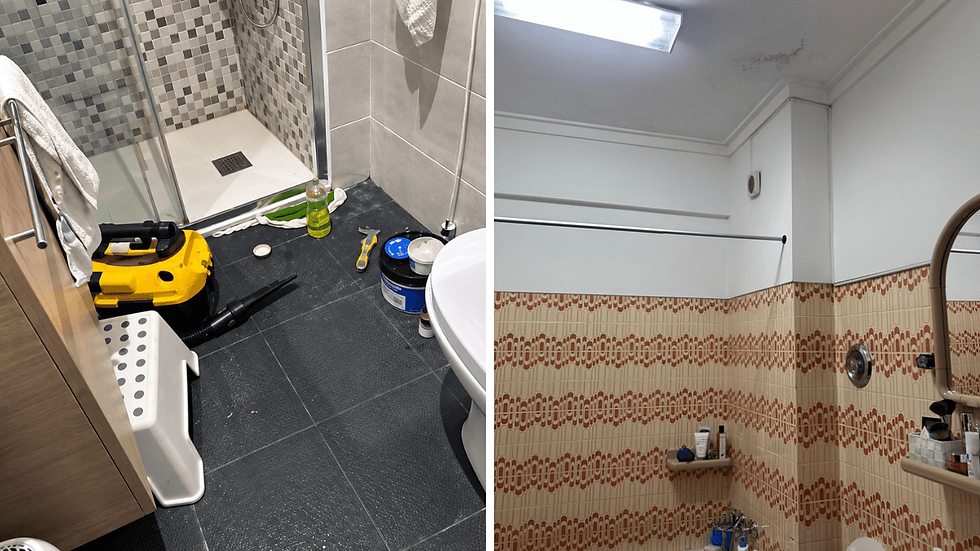
When I inspected the shower, the silicone joints appeared reasonably sound. Something else caught my attention: the prefabricated shower tray sat above the bathroom’s tiled floor, with a rigid cement or tile-adhesive connection along its outer edge.
I considered whether water might be entering the floor outside the shower and travelling beneath the tray, rather than passing through the silicone inside the enclosure.
Shower trays can move slightly under normal use and as temperatures change. If the connection to the surrounding floor is rigid, that movement may create a small
separation, giving water a route to escape beneath the tray.
Tracing the Moisture from the Apartment Below
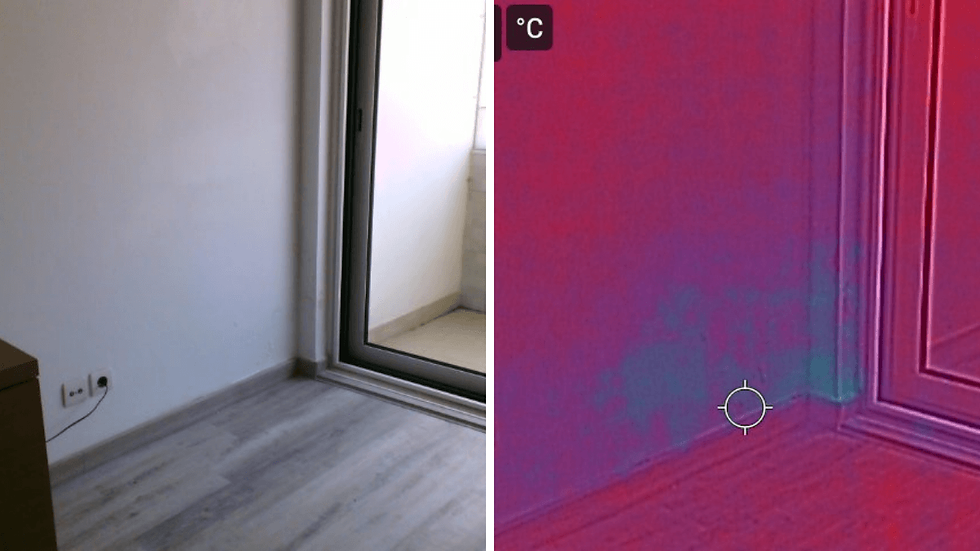
I first examined the damaged ceiling downstairs using thermal imaging. The camera revealed temperature patterns consistent with moisture extending beyond the visibly stained area. Moisture measurements helped narrow down the affected area.
This matters because the visible stain does not necessarily show where water entered the building. Water can travel through concealed spaces before appearing on a ceiling or wall.
The findings helped me identify the area to investigate in the upstairs bathroom. I could then carry out leak detection and water ingress investigations to test the suspected water pathway directly
Shower Leak Investigation: The UV Tracer Test
The shower leak investigation continued upstairs, where I used temporary plumber’s putty to form a small barrier around the suspected entry point beside the shower tray.
I introduced water containing fluorescent UV tracer dye into the isolated area. This technique helps trace where water travels: the dye follows the water, and ultraviolet light makes the fluorescent traces visible.
Around ten minutes later, I returned to the bathroom downstairs, turned off the lights and examined the ceiling with a UV torch.
The fluorescent dye was visible in the already moisture-affected area.
The test confirmed that water introduced at the front edge of the shower tray had travelled through the floor construction and reached the damaged ceiling below. This established the water pathway rather than relying solely on the initial assumption that the silicone had failed.

The Repair: Allow Movement, Stop the Water
The priority was to address the area where water was getting beneath the shower tray, rather than simply replacing the silicone and hoping that resolved the problem.
The recommended approach was to open the front of the shower installation sufficiently to expose the area where the tray meets the surrounding floor. This would allow the supporting layer and surrounding waterproofing to be assessed.
Any loose, cracked or deteriorated materials would need to be removed and repaired.
The shower tray should be stabilised if necessary, followed by the installation of a suitable flexible waterproof seal that can accommodate small movements between the tray and the surrounding floor.
The exact materials and repair method would depend on the condition of the concealed installation once it had been opened.

From a Rejected Maintenance Claim to an Approved Repair
The initial insurance assessment treated the leak as failed silicone and therefore as a maintenance problem. My investigation identified a different concern: a concealed water pathway beneath the shower tray, rather than simply a problem with the visible seal.
Once the affected area was opened, the deteriorated connection could be examined. The findings supported a different explanation for the damage, and the insurer subsequently reconsidered its decision and agreed to cover the claim.
For Bernardo, this changed the position considerably. Instead of proceeding with the original proposed repair based on the assumption that the silicone was at fault, there was now a clearer understanding of the underlying problem and what needed attention.
How a €950 Repair Could Have Become a €1,900 Problem
The original quotation from the leak-detection specialist was approximately €950 for the proposed shower work and the downstairs ceiling.
Had that work gone ahead without addressing the concealed water pathway, the leak might have continued. Further work upstairs and another ceiling repair could potentially have brought the total cost close to €1,900 or more.
Instead, Bernardo paid approximately €300 to All Property Building Diagnostics for a targeted investigation that identified where the water was entering and helped direct attention towards the appropriate repair.
The higher figure is a potential scenario, not a confirmed cost Bernardo incurred. The value of the investigation was that it helped avoid committing to a repair without first establishing the source of the leak.
“Jeff Is from Another Planet”
Some time after the inspection, I bumped into the mutual friend who had originally recommended me to Bernardo. She told me what Bernardo had said about the experience:
“Jeff is from another world. He’s not from this planet. He just came in, looked at it and saw the problem immediately.”
It was a memorable compliment. But what looked like an immediate answer came from practical building experience: recognising a possible weakness in the installation and then using diagnostic equipment to test it.
Experience tells us where to look. Specialist equipment helps us demonstrate what we have found.
What This Case Demonstrates
A leak can have a different cause from the one initially suspected. In Bernardo’s case, identifying the actual water pathway provided a clearer basis for deciding what needed to be examined and repaired, rather than simply replacing the silicone and hoping the problem would disappear.
Find the cause first. Repair it once.
Before You Pay to Fix a Leak, Make Sure the Source Has Been Found
If water appears through a ceiling, around a shower, or in a neighbouring apartment, the most obvious explanation isn't always the right one. A targeted investigation can help establish where water is travelling and what needs further attention.
All Property Building Diagnostics provides independent property inspections, moisture investigations, thermal imaging and specialist leak detection in Cascais, Lisbon, Sintra and surrounding areas.



Comments